Friday, December 16, 2011

A Quilt in a Day?!

I started and finished a quilt in one day, actually in less than 10 hours and that's started and finished a single quilt!  The fabric arrived in the mail around 1PM and I was throwing it in the washing machine around 10:30PM.  Now its just a baby quilt, measures about 33 X 40, but still, I'm pretty impressed with myself.


Colton's Quilt

I cut all of the fabric and arranged the layout of the rows.

Colton's Quilt

I chain pieced the rows and then added the sashing.

Colton's Quilt

Pieced the backing and basted it all together.  Then, for the very first time, stippled the whole thing!  I love stippling, but haven't had the guts to try it out on a quilt so I just decided to dive in and do it.  I am so glad I did.  I think I did pretty good for my first time!


Colton's Quilt
Colton's Quilt
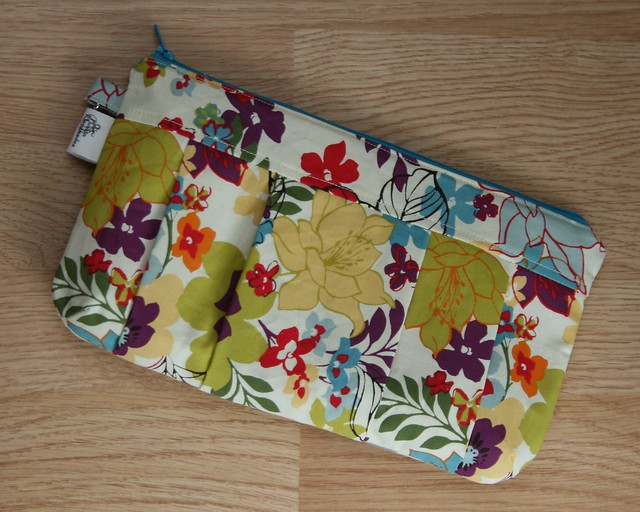
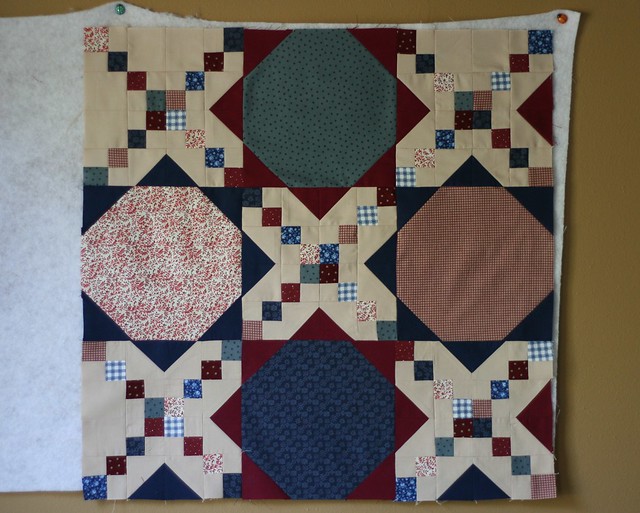
Sorry for the shadows, I was in a bit of a hurry and didn't even notice!

And voila!  A baby quilt for my nephew for Christmas!

Colton's QuiltColton's Quilt

This is one of Amy's quilt patterns over at Oh, Fransson!, it's this one.  Super easy and came together in a flash! ;)  Made from 38 charm squares and 5/8 of a yard of fabric for the sashing!


Thanks for stopping by!

Tuesday, December 13, 2011

Hexies!

I've lost the battle with hexies and I've been sucked in!  Seeing this quilt is what did it, isn't it gorgeous?!

My First Hexies!

Thursday, December 8, 2011

A Craft Show, Christmas Gifts and A Cookie Sale

Loveland Craft Show Display

My craft show last Saturday went pretty well, for my first show I think it was perfect!  Considering it was cold and rainy I figured it could go either way, but people came out, well, at least in the morning they did.  Despite that it had pretty much stopped raining by noon it was dead the rest of the day.  But that was fine, it gave my friend (who made the soap you see there, I love it!) and I a chance to chat and make a game plan for future shows.

Loveland Craft Show Display

Space was a little tight, but I think we made it work!  Thanks to my box hoarding (I think I have a problem) we were able to create some dimension by placing them under the table cloths to make little raised platforms.  I think it worked out great!  Plus the tall box in the center was open to the back so we were able to put our money box right in there and it made a great little cubby to keep things out of sight.  We talked about getting/making different displays for future shows, but for now this was perfect.

All in all, it was a good day!

Now I need to start focusing on Christmas, with only a couple of weeks to go I think it's time!  My mom and I are going shopping this Saturday.  I don't really have much to buy.  Some K cups for my sister, a gift card for my bro-in-law, something for my mom...(any ideas, $20 or less), kitchen gadgets for niece 1 and containers to hold the hot chocolate and cappuccino mixes I made for nieces 2 and 3.

I also need to get some aprons made.  Just something fun I am doing.  My church sponsors a MOPS group (Mothers of Preschoolers) and we are have a Christmas Cookie Sale this Sunday to raise funds for our group.  Last year was our first year doing it and it was wildly successful.  All of us moms and our moms and some friends make dozens and dozens of cookies and treats then set up a giant cookie/treat bar and then folks come in and make up their own cookie/treat platters and pay by the pound.  It's tons of fun!  Well, I'm making aprons for everyone who is working the event this year.  Just a little extra touch of fun!

My apron is based on this one, but made out of a couple fat quarters and some jelly roll strips I got from Connecting Threads.  My construction is different, other than sewing on the strip along the bottom, and I added a pocket.  They're cute little aprons!  I will try to post pics after the sale.

After not posting for a while I can't stop rambling! 

Thanks for stopping by!

Tuesday, November 29, 2011

Sewing Away!

Crayon Rolls

Lots of sewing happening around here!  These little crayon rolls, plus many more, have been keeping my busy today.  I only have a few days left so I better get back to it!

Thursday, November 17, 2011

Hello...

...is anyone still out there?  I hope so!

You know, I really don't have a good reason I haven't been  blogging lately...just excuses.  I've been busy.  I haven't been motivated to sew much.  I had family in town...  Blah, blah, blah.

Truth...  I've just been lazy.  I have a few things that need to get done, like yesterday, and instead of taking on one task at a time I'm choosing not to work on anything.  Do you ever get that way, you get a little overwhelmed and you just shut down?

So maybe it wasn't a great idea to take on my first craft show two weeks from Saturday...  I've been working on things here and there, but not enough.  I am quite excited about it though!   I have a lot of small things, but I would like to get some totes and larger bags done so I need to get my butt in gear.  It's just a small booth with one 8ft table and I'm going in on it with a friend who makes soap so I don't have to have a ton of items, but I would like to have a nice display.  We'll see.

Anyway, I really do need to get busy.  Here are some key fobs I did a couple of nights ago.  I have a lot of work to do...


Thanks for sticking around!

Wednesday, October 5, 2011

Finally! Some Wedding Stars

So I finally felt like sewing yesterday!  Yay!  It's about time.  I'm gonna be pretty busy since we leave for Tennessee two weeks from today and I need to have this quilt done for the wedding gift.  Why oh why do I procrastinate so much?!  I always pay for it in the end...

Wedding Stars Quilt Progress

So anyway, I'm making this quilt for my brother-in-law and future sister-in-law.  I knew I wanted to make them a quilt, but didn't know where to start knowing they are more traditional.  I decided I wanted to make them a large throw sized quilt for them to snuggle under on the couch together.  Their living room is decorated in an Americana theme so there were my colors and I wanted to keep with the theme by doing some kind of star pattern.  That's when I remembered seeing this Chubby Starts QAL over at Tracyjay Quilts.  Perfect!

Wedding Stars Quilt Progress

I got all of this piecing done yesterday.  I've had everything cut since the middle of August and had six blocks done for the past month.  I finished three more blocks yesterday as well. 

Wedding Stars Quilt Progress

Those chain pieces finish at an inch!   They are really hard to piece accurately, but oh well.  I like the way it is turning out and I know they will love it.  I'm calling it Wedding Stars! 

I need to get busy so back to sewing!

Sunday, September 25, 2011

Jasper

Just a warning, this is not a happy post.

Sorry I have been MIA lately.  I haven't been sewing or really doing much of anything productive.  My husband drives truck and we've only seen him once in the past 9 weeks.  I've just been having a hard tame lately dealing with things and to add to it I had to put my Westie down yesterday...  It was probably the hardest thing I have had to do.


We got Jasper the summer before we got married.  We weren't really looking for another dog, but when I first saw him I knew I had to have him.  He and Oliver were instant buddies and he was a great addition to our little family.

Jasper was a great dog.  He was well behaved and pretty mellow as far as terriers go, always loving and loyal, and a blast to play fetch with! 

When our son was born he was last on my list to be worried about among our three dogs.  I knew he would welcome a new buddy to play with and he did.  Unfortunately it has only been this past year that Riley has really got into playing with him, but I know he loved every minute of it. 

This past week Jasper started getting sick over and over again.  After hospitalizing him, running multiple test and seeing his general health deteriorate his doctors came to the conclusion that he had a neurological disorder.  They said that even IF he responded to and did well with treatment he still wouldn't be doing great and would definitely be gone with in a year.  So we had to make the horrible decision that no pet owner ever wants to make.

At least now he is happy and healthy with God, but it is still so hard.  Everything reminds me of him.  Even just letting our other two dogs outside, I see two go out and out of habit I am waiting for the third...

Monday, September 12, 2011

Missing In Action

Butterprint Cinderella Mixing Bowls

I've been cheating on sewing with vintage Pyrex and beautiful weather! 

I really should be sewing...I started a quilt that needs to get finished for a wedding next month!

Just checking in...  Hopefully I will have some sewing to show you here soon!

Tuesday, August 30, 2011

A First For Me

More Peaches

I finally started canning!  The past few years I've researched canning and planned to do it, but then just never did.  Last year I got a bushel of apples and intended to can some of them, but instead made 3/4 of them into pies to freeze and stored the rest.

The last of the bushel.

This year I got a 1/2 bushel of peaches (I now wish I would have gotten a whole bushel).  The last two days I have been up to my elbows in peaches, literally, the juice runs everywhere!  They are SO good it was hard not to keep eating them!

Processing

My friend came over with her 1/2 bushel of peaches and we worked together.  It's so much more fun that way! 

Peach Pie filling!

I made all of my peaches into pie filling.  I started with 11 jars, but three from my first batch didn't seal. :(  This was a bit discouraging, but I quickly turned it around by making them into pies and freezing them.  So I ended up with 3 ready to bake pies and 8 quarts of filling.  I can't wait to have fresh peach pie in the middle of February!

Peaches

My friend canned all of the peaches she brought (she has another 1/2 bushel at home!) in light syrup.  She ended up with 8 quarts.  Don't they just look delicious?!  She was nice enough to leave behind 15 or so peaches and I plan to can a few pints like this, they just look too good not to have some!

We ordered our peaches from a small Amish market about 30 minutes from here and they also do the apples.  So we placing our order for apples here in the next few days.  I might be crazy, but I plan on getting 2 bushels.  The Jonathans they get are SO good.  My son and I just eat them up!  So I will probably get a whole bushel of just Jonathans and then a couple 1/2 bushels of two other kinds to have a mixture.  I plan on canning pie filling, applesauce and apple jelly, yum.

I also have a bowl full of tomatoes in the fridge from my friends mom and I plan on heading out to my parents this afternoon to pick what they don't want from their garden.  And then I'm heading to the farmers market in the morning to see if I can get a good deal on some more tomatoes!  Then I will can them to have tomatoes for chilli and salsa all winter.  I love this canning business!

So not much sewing, but lots of yummy peaches!

Friday, August 26, 2011

Pleated Clutch Tutorial

I'm very excited for my first tutorial!  I love making zip pouches, they are so fun and come together very quickly.  But beware, they are very addicting!  It's hard to make just one.

Pleated Clutch Tutorial
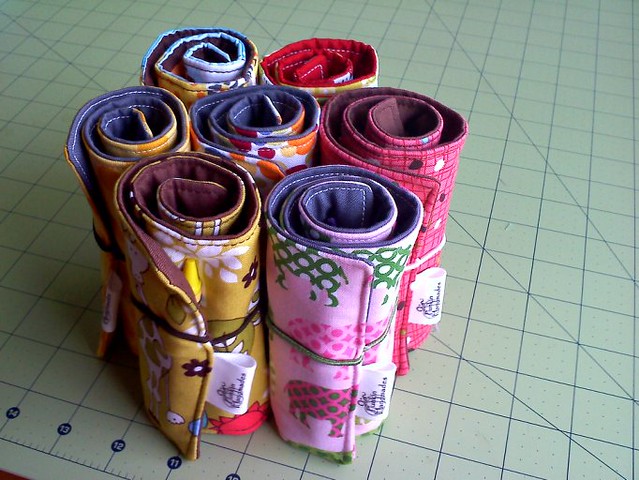
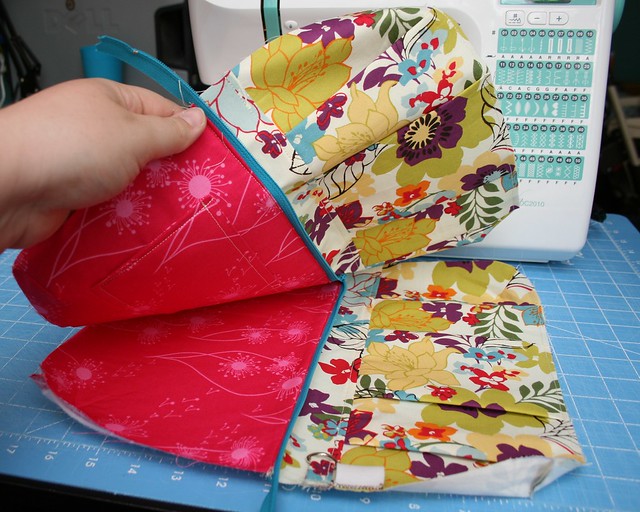
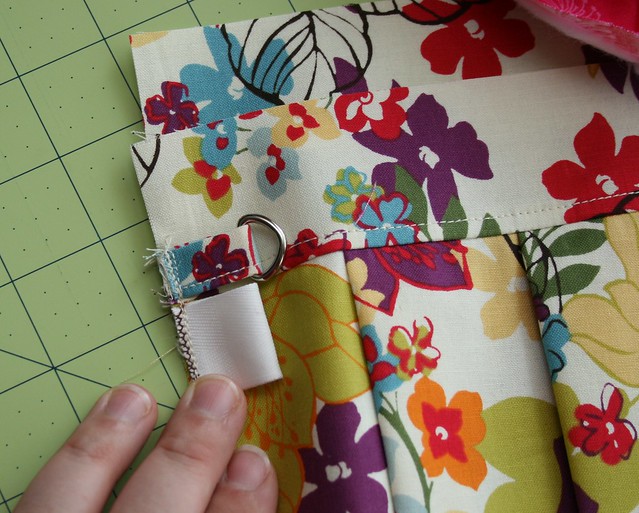
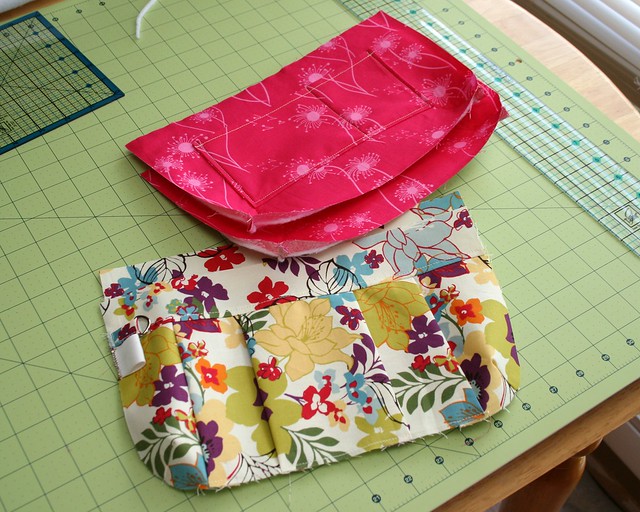
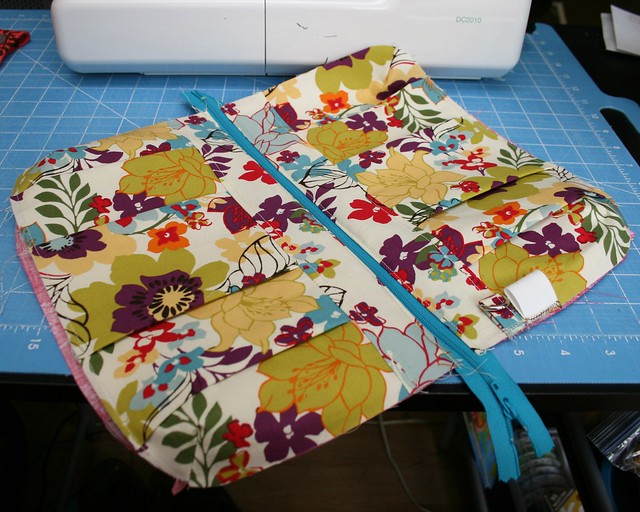
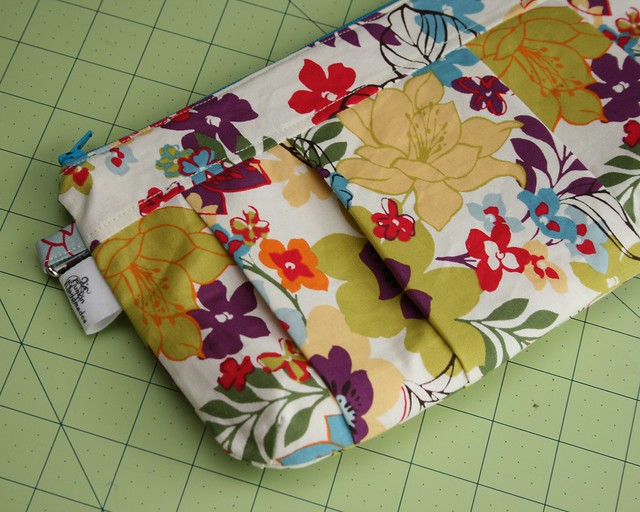
This bag finishes at about 11"x6.25" with a divided pocket on the inside.  It's nice and sturdy due to the fusible fleece attached to the lining.  I also rounded and darted the corners to give it a nice shape that wouldn't just be flat.  I am very happy with the way this bag turned out and hope you are too!


You will need:
For the outer fabric- (2) 5.5"x18" and (2) 2"x11.5"
Lining fabric - (2) 7"x11.5" and (1) 8.5"x8.5"(pocket)
Light weight interfacing - (2) 5"x17.5", (2) 1.5"x11" and (1) 8"x8"
Fusible fleece - (2) 6.5"x11"
Matching Zipper - at least 12" (Mine was 14" because that's what I had on hand.)

Optional:
Outer fabric - (1) 2"x2"
A .5" D-ring

Alrighty, lets get started.  Attach the matching pieces of interfacing to the 4 outer fabric pieces and to the pocket following the manufactures instructions.


Take the 2 large outer pieces and line them up on your cutting mat or use a ruler to mark it for the pleats.  Mark the center of the 18" length, then mark 1" from the center, then 2.5", 4.5" and 6" along the edge.  Repeat on the other side of the center line.  Do this on both the top and bottom of each piece.

Pleated Clutch TutorialPleated Clutch Tutorial

Starting from the outside fold the fabric on the first line and then match it up to the second and pin it.  Repeat along the bottom edge.  Now fold the fabric at the second line and match up with the fourth line in the same manner as before and pin it.  Repeat along the bottom edge as well.  Turn the fabric around and repeat the process on the other side.  When finished you should have 2 pleats on each side that fold toward the center.  Repeat the entire process on the second piece.

Pleated Clutch Tutorial

They should look like this.


Pleated Clutch TutorialPleated Clutch Tutorial
Now you need to round the bottom corners.  Just find something small and round, place it on the corner lined up with the sides and trace.  I used a small candle, you don't want anything too big.  Then cut off the corner on the line you drew.


Pleated Clutch TutorialPleated Clutch Tutorial
Pin the top bands to the pleated sections.  My pleated sections were slightly larger than 11.5" so I lined up the ends and pinned them and then the center and then again between the center and the edges.  This way any extra would be eased into the 11.5" band.  Sew with a quarter inch seam.  Press the seams up toward the bands.


Pleated Clutch Tutorial
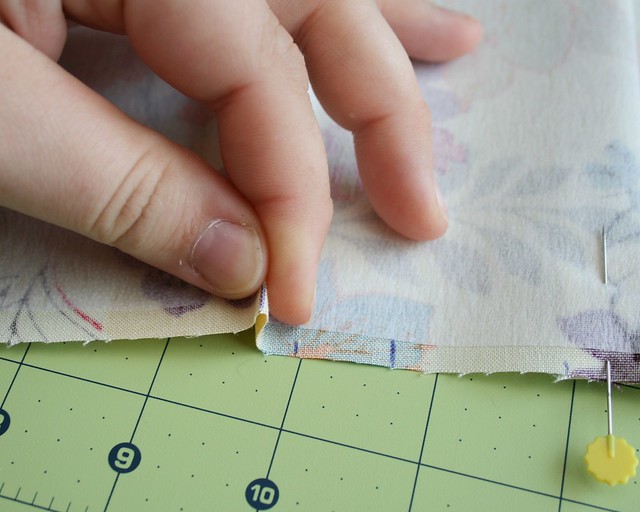
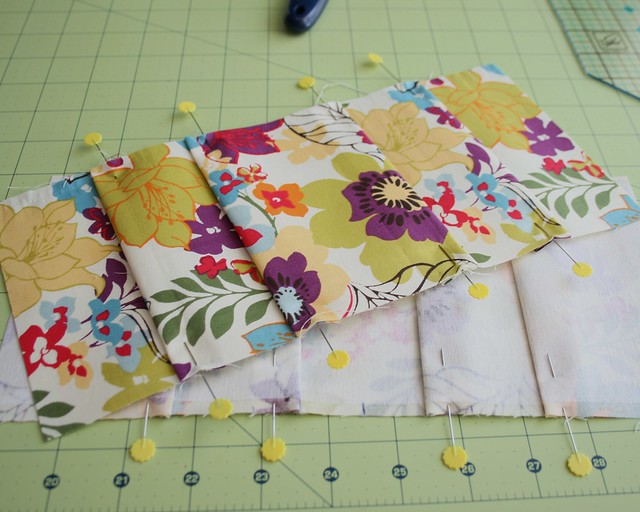
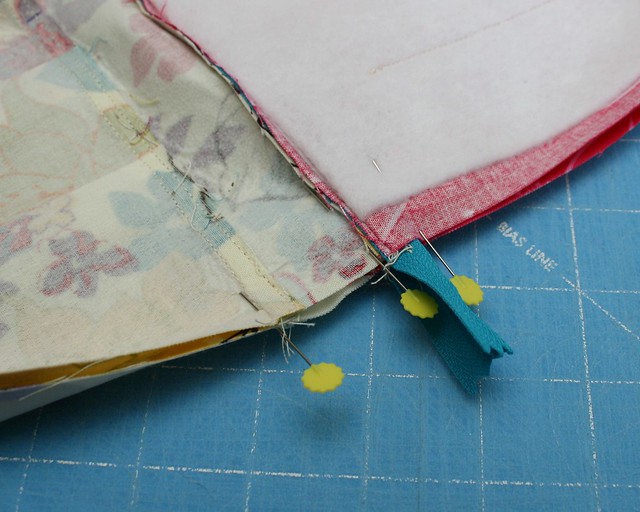
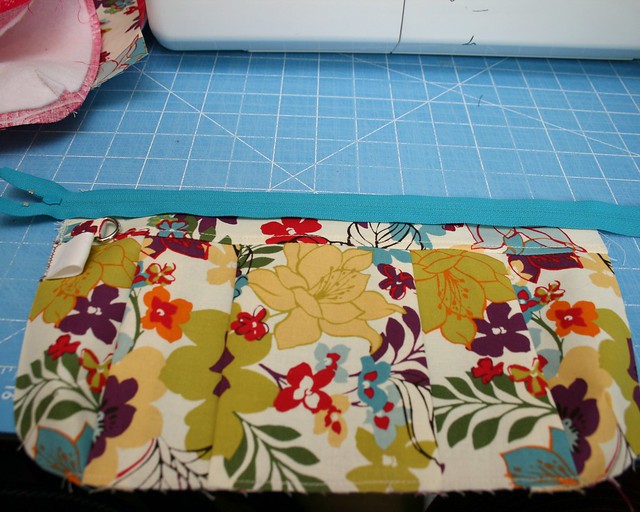
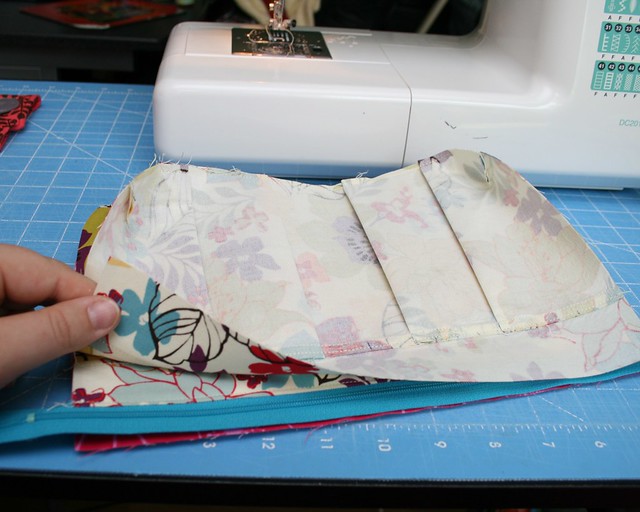
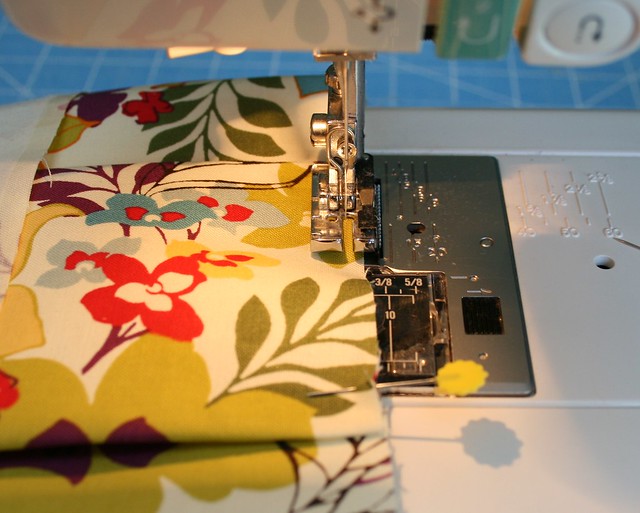
At this point I also stitched along the bottom just in about an 1/8 of an inch to baste the pleats so I could get rid of all the pins.


Pleated Clutch Tutorial
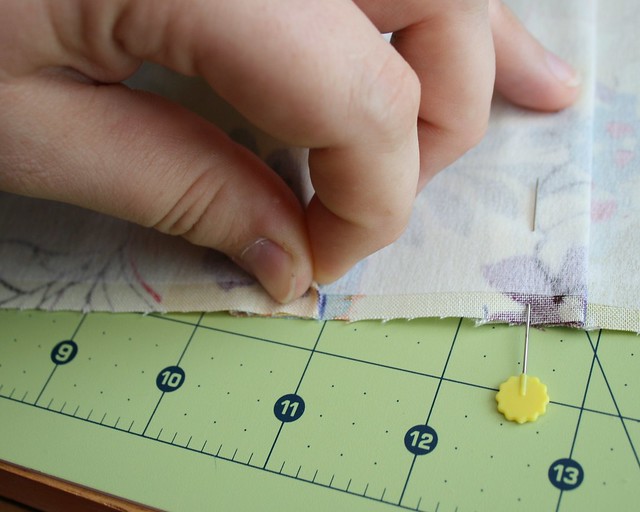
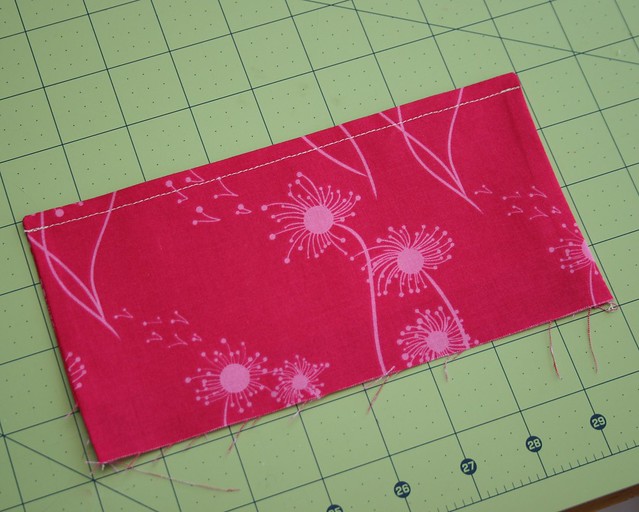
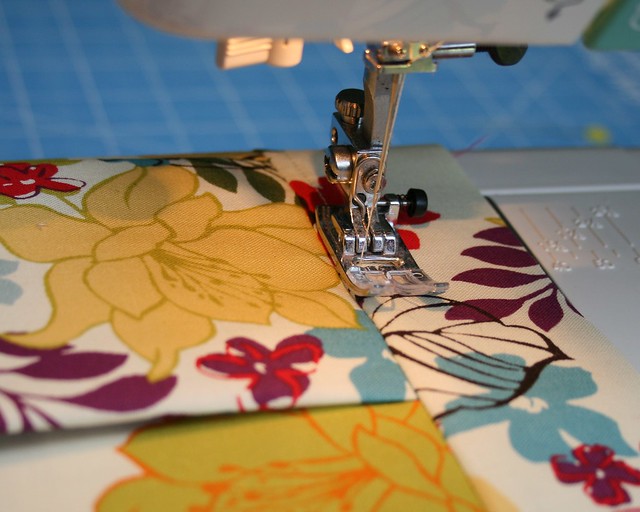
Top stitch a scant quarter inch up from the seam on the top band.


Pleated Clutch TutorialPleated Clutch Tutorial
Now you need to dart the corners.  I lined up my pieces on my cutting mat and used the 45 degree line to mark an inch in from the edge.  Mark all 4 bottom corners in this manner.  Then fold on the line, right sides together, and sew a line starting on the inside, an inch in, to the edge a quarter inch from the fold.  It might help if you mark the back side of the back side of the fabric.


Pleated Clutch Tutorial

If you are attaching a D-ring or would just like a loop of fabric you need to grab your 2"x2" piece of outer fabric.  Fold it in half and press.  Unfold and fold the edges into the center fold and press again.  Keep the edges folded in and refold along the center line, press again.  Stitch about about an 1/8 of and inch along along the unfolded edge.  You should now have a piece that measures 2" by about .5".  I hope that is clear, I'm sorry I don't have any photos.  Slip on the D-ring and fold in half.  I usually stitch mine to the left side of the front, but it is up to you, this bag doesn't have a clear front and back so it doesn't really matter.  Stitch it on the top band just above the seam (see photo) about an 1/8" from the edge.

At this point the outer pieces are finished.  Time for the lining.

Start by rounding the bottom corners of the lining pieces the same way you did the outer pieces.  You also need to round the corners on the two pieces of fusible fleece.  Once the corners are rounded you can attach the fusible fleece to the lining pieces, again, follow the manufactures instructions. 


Pleated Clutch Tutorial
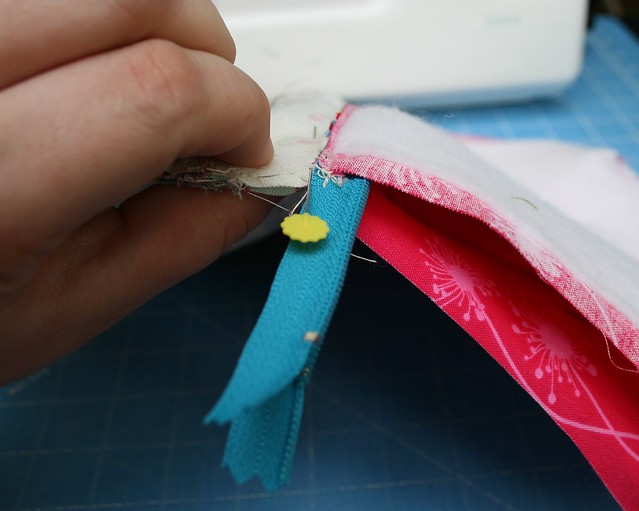
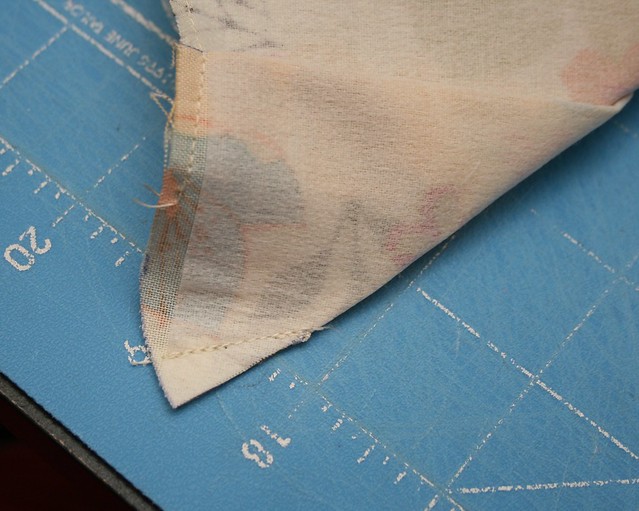
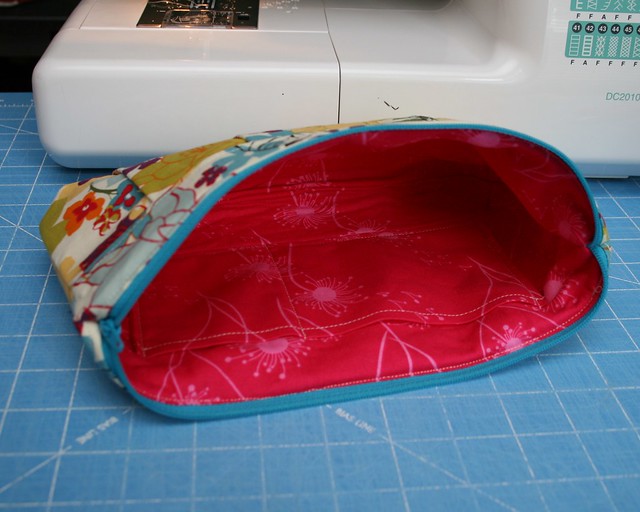
For the pocket grab the 8.5"x8.5" lining piece, fold in half right sides together and stitch down the sides.  Turn right side out, press and then top stitch along the folded edge about a quarter inch down.


Pleated Clutch TutorialPleated Clutch Tutorial

Lay the pocket piece upside down so the raw edge is about 2" from the bottom.  Make sure it's centered and sew a quarter inch from the raw edge, press up.  Pin in place and then sew a scant quarter inch up both sides back stitching and the beginning and end.  Then come in about 2.5"-3" from the right side and stitch up from the bottom back stitching again. (Don't mind my pocket piece, it was a little short, but I made it work.)


Pleated Clutch Tutorial
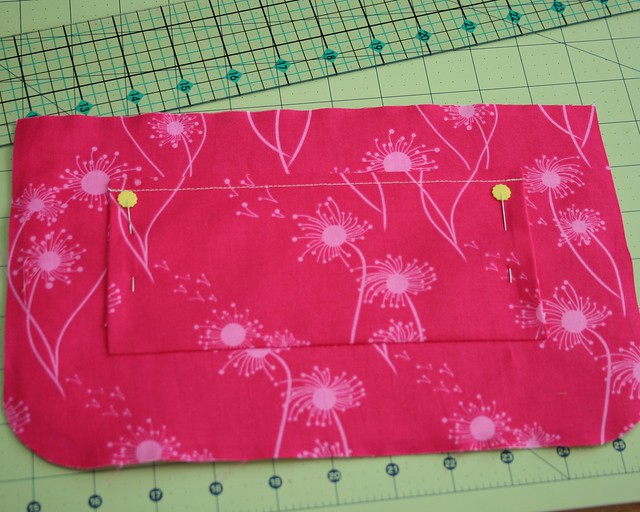
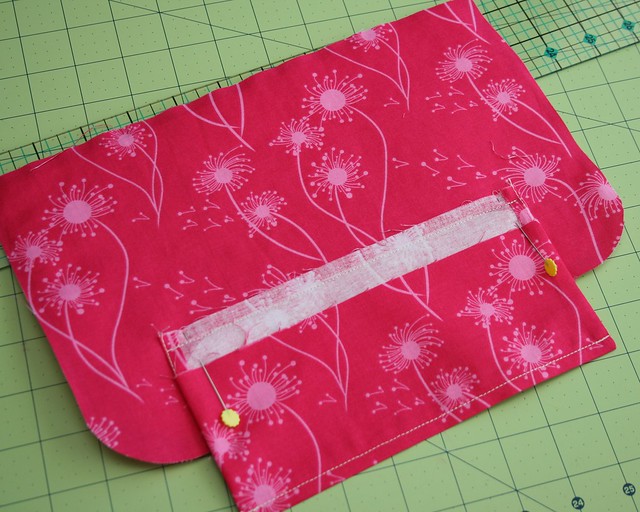
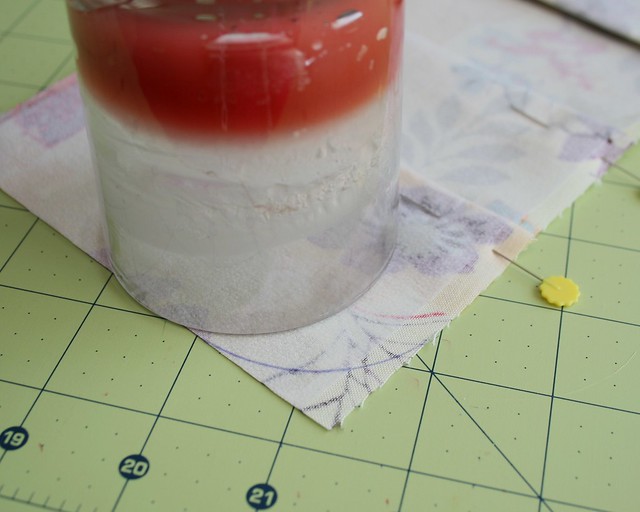
Dart the bottom corners of the lining pieces in the same manner as you did the outer pieces.

Now the outer and lining pieces are finished and ready to become a bag!


Are you still with me?  I know this is getting pretty long!


Pleated Clutch TutorialPleated Clutch Tutorial
Take an outer piece and lay it right side up, place the zipper top/right side down along the top edge.  Then lay the lining piece right side down lining up the top edge with the zipper and top edge of the outer piece.  Pin and sew a quarter inch from the edge.  You can use your zipper foot, but I didn't.


Pleated Clutch TutorialPleated Clutch Tutorial


Now flip back the outer and lining piece away from the zipper and top stitch about an eighth of and inch from the edge.


Pleated Clutch TutorialPleated Clutch Tutorial
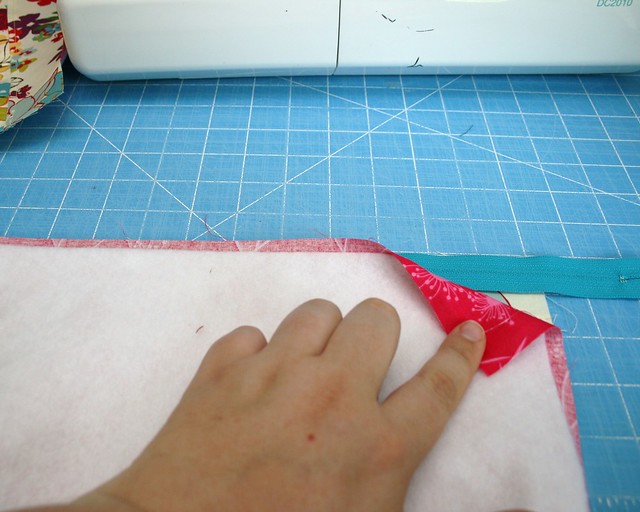
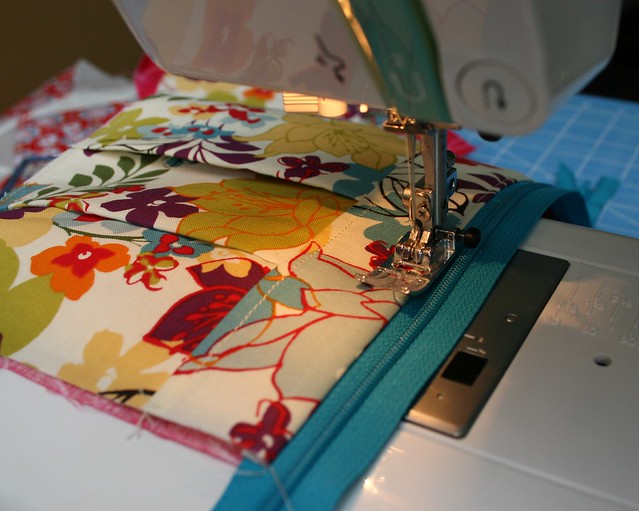
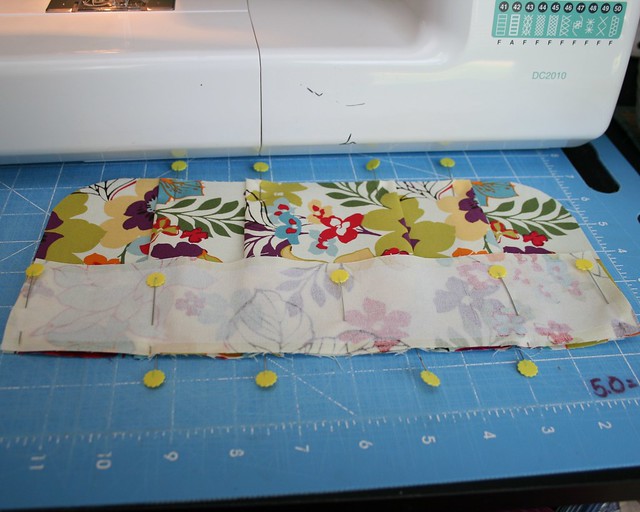
Repeat with the two remaining pieces making sure the outer pieces are right sides together and the lining pieces are right sides together and top stitch.

Pleated Clutch TutorialPleated Clutch Tutorial

Flip the pieces back right sides together and unzip the zipper 3/4 of the way.


Pleated Clutch TutorialPleated Clutch Tutorial

Pin all the way around the edges making sure to pin the zipper coils towards the lining.  Make sure to pin it good around the zipper so it doesn't shift while sewing.  I made sure to line up the darts and and pleats when pinning.

When sewing around the edges I used a 1/4 inch seam around the outside pieces and more like 3/8 to a 1/2 around the lining pieces.  This just makes sure the lining fits nicely and doesn't bunch up.  Make sure to leave a 3"-4" opening in the bottom of the lining for turning.

Pleated Clutch Tutorial


Once you've sewed around the edge, turn the right side out and either machine or hand stitch the opening closed.  I always machine stitch it since it's on the inside and no one will really see it.  Stuff the lining down into the bag, shape it up a bit and voila!

Pleated Clutch Tutorial

I hope this all made sense.  If you have any questions please leave them in the comments and I will respond to you and also update the tutorial.  If you make one please leave a link in the comments, I would LOVE to see it!

**Update**
Feel free to post any photos of your bag in my new Flickr group!