Friday, August 10, 2012

Colorado

Colorado was great, It was nice seeing family! The trip there and back was a long 19 hours each way, but Riley did very well and slept more than I thought he would so that helped. The weather was nice, hot, but bearable. We had tons of fun just hanging out, swimming and doing a little shopping. 

Colorado 2012

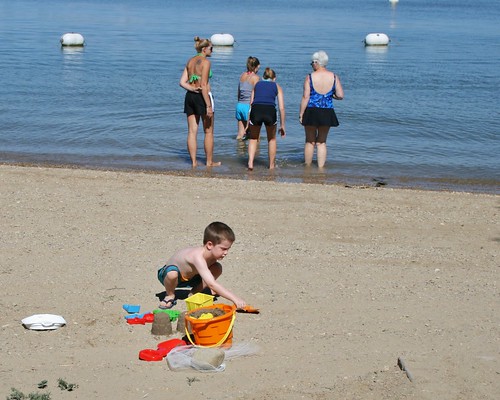
The last whole day we were there we went out to a local lake for some swimming, a picnic lunch and some fun on my brother's boat. It was a blast!
Colorado 2012

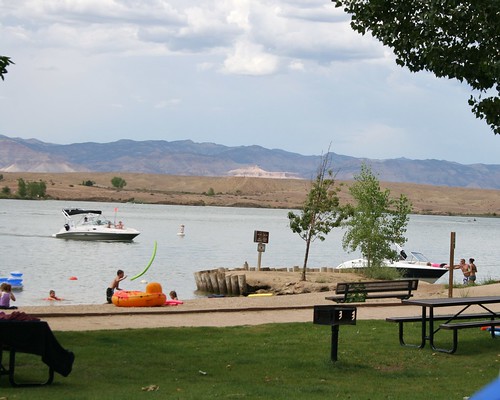
The lake was surrounded by mountains most of the way around it and it was just gorgeous!

Colorado 2012

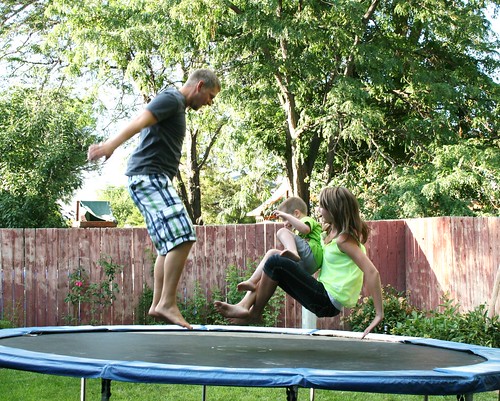
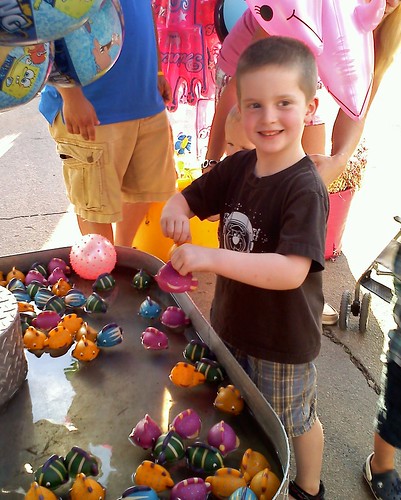
Riley had a ton of fun playing with his aunts, uncles and cousins.

Colorado 2012

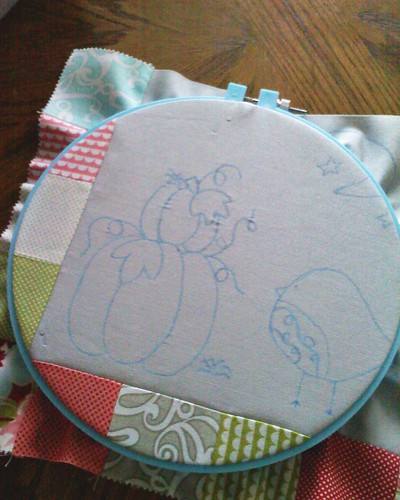
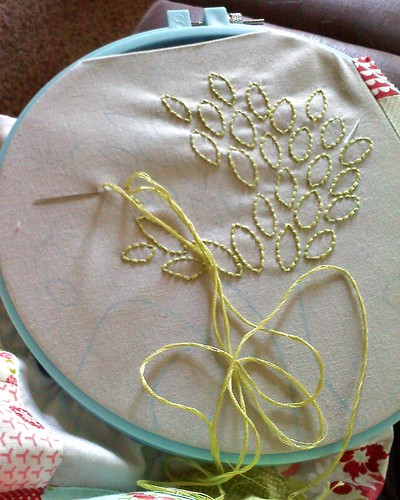
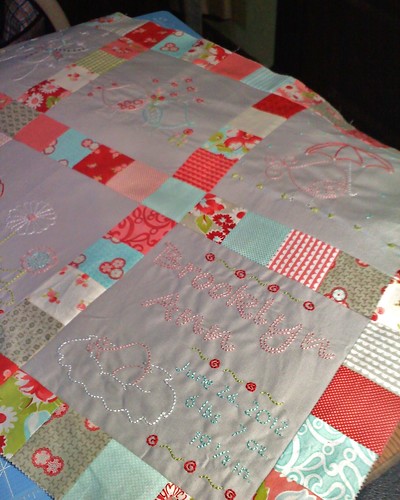
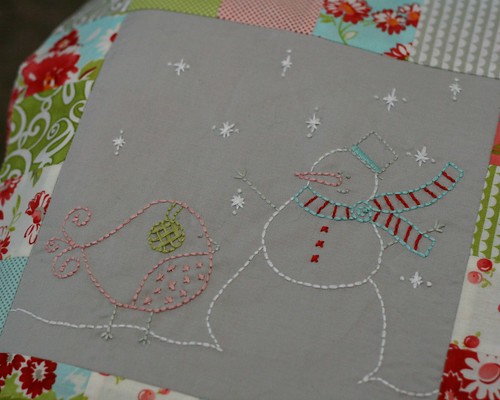
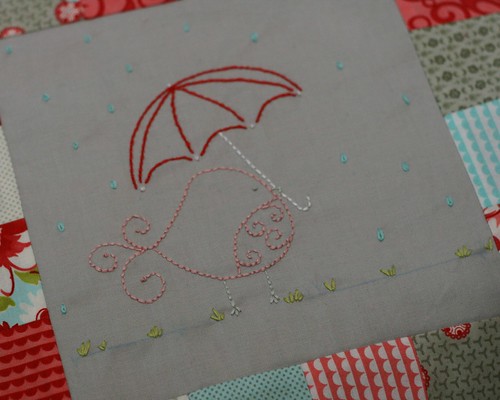
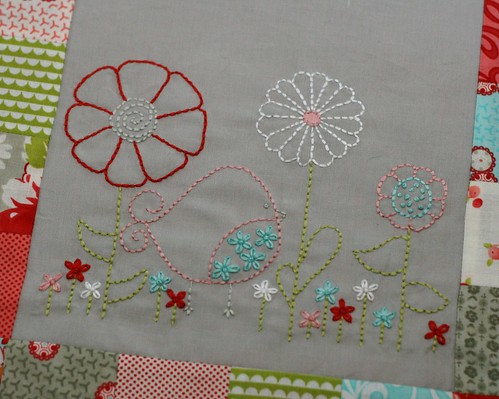
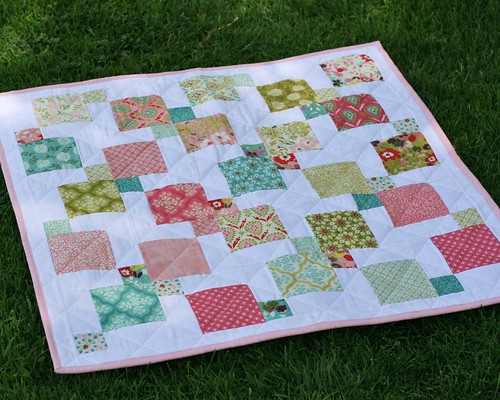
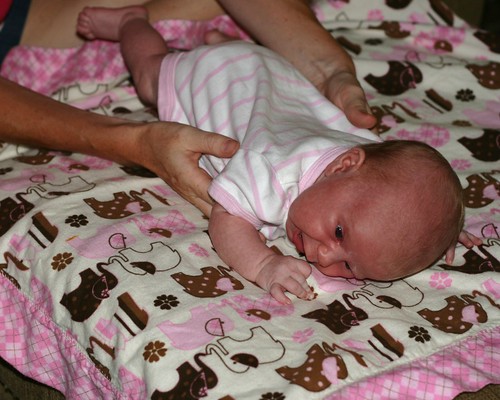
B is absolutely adorable!  I couldn't get enough of her and it was really hard leaving knowing it would be at least five months before I would get to see her again.  Here she is laying on the Ruby Bird Baby Quilt I made for her.  Her mom and dad loved it so I know it will be used which is all I ask for!

Colorado 2012

Here she is making her "cheerio face" as her daddy calls it.  She does it all of the time and it is so cute!

Colorado 2012

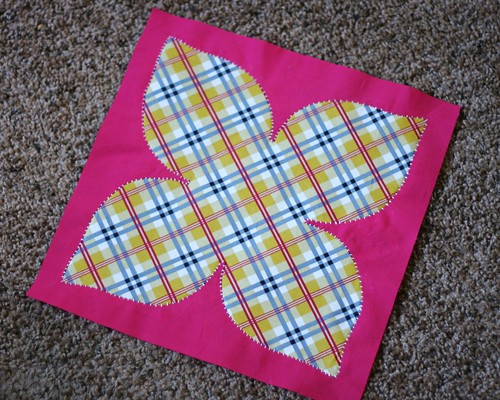
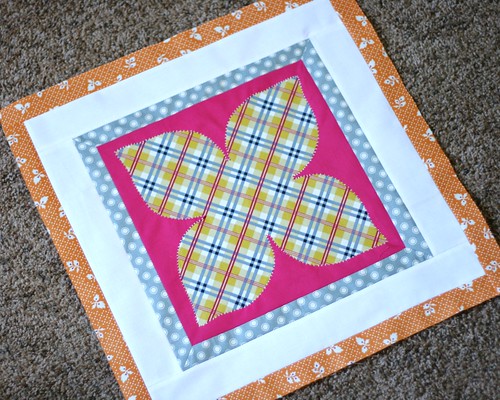
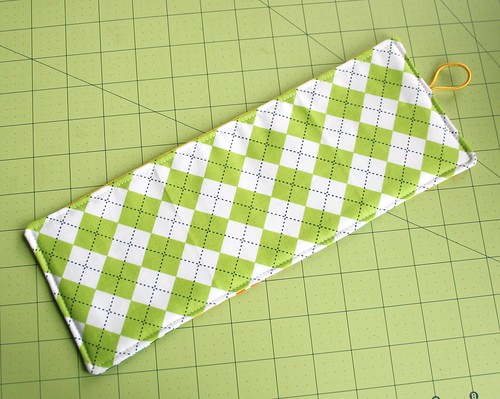
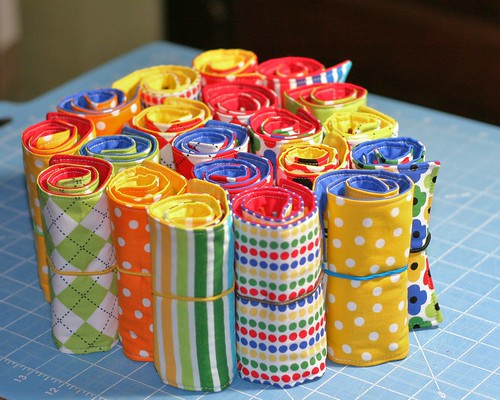
This photo is more of the blanket she is on than actually of her, she was not very happy at the time (and excuse the poor photo.)  Back in March I made this self binding baby blanket, there are tons of tutorials out there, and matching burp cloths, bibs and wash cloths.  I had planned on sending them out for the baby shower, but then they didn't have one so I took them out along with the quilt and they were in full use by the time we left.  When we got out there I realized I didn't have any pics of them so this is all you get. 

Colorado 2012

While we were out there I took some time to do my niece's senior pictures.  I just wanted to share one with you all.  I can not believe she is a senior in high school!  I was in fifth grade when she was born and I remember it like it was yesterday...  Anyway, isn't she beautiful?  I realise I'm a bit biased, but come on.

Overall the trip was great and I miss them all so much already!  We may be going back out for Christmas or they may be coming here, we're not sure yet.  Either way I can't wait!

Have a great day!

Christine

Thursday, July 12, 2012

Wordless Thursday?


To bad I wasn't more on my game to get this posted yesterday, but oh well.  Here are some wonderful (she said sarcastically) photos from the last week or so.

Ruby Bird Baby Quilt Progress

Ruby Bird Baby Quilt Progress

Ruby Bird Baby Quilt Progress

4th of July Festivities

4th of July Festivities

4th of July Festivities

4th of July Festivities

4th of July Festivities

4th of July Festivities

I hope you had a wonderful 4th of July!

Christine

Monday, July 2, 2012

Retro Travel Bag

Retro Travel Bag

I was browsing through my Pinterest boards the other day and came across this cute Retro Travel Bag, perfect for my upcoming trip.  I was suddenly inspired to sew!  It was nice feeling that way again...I think maybe the idea of having something to blog about was also giving me a little push.

Retro Travel Bag
I left off the piping since I didn't have any and added lots of pockets, including one on the outside. I also made my own handles and made them long enough to carry the bag on my shoulder.
Retro Travel Bag

I didn't have the right sized zipper so I had to refigure the sizing of the side pieces and had to do quite a bit of readjusting to make it fit to the front and back pieces, but made it work in the end. It wasn't the right type of zipper either. The tutorial called for a parka zipper that completely came apart which was not what I had. So I attached the zipper in the same manner as I would on a zip pouch and the sewed on a piece of fabric that was the total width of the zipper and the fabric on each side of it.

Every piece of fabric except the two large lining pieces has heavy interfacing attached. The outer front and back as well as the large interior pieces and the bottom section all have fusible fleece. This baby is nice and sturdy! I also quilted the outer front, back and bottom pieces to keep everything together.

When it came to attaching the front and back to the side piece I threw the tutorial out the window. Good idea? Maybe, maybe not. To be honest there isn't a lot of visual detail when it comes to attaching the lining so I was a little confused. So instead of trying to figure it out I just came up with my own way.
Retro Travel Bag

For the front and back I basted the outer and inner pieces together so they wouldn't shift while I was sewing.  The zipper section and the bottom section were all assembled with the wrong sides of the inner and outer pieces sewn together.  With the outer sides together I pinned the top/bottom/sides ring to the front panel.  This took a lot of patients and because of the thickness I ended up with quite a few bent pins.  Pinning the on the back panel was even more frustrating, but I got it done.
Retro Travel Bag

My way of assembly left exposed raw edges and I had every intention to cover them with bias tape, but after realizing the thickness and struggling a bit to get it through my maching I decided to skip it.  So I went back and zigzag stitched over the edges to stop any fraying that would occur, if I had a serger I would have used that.  I'm pretty happy with how it turned out.

Retro Travel Bag

I added a bunch of pockets on the inside because I love pockets; they help keep me a little more organized.  On the front side I added some simple pockets using the same method I used for my Pleated Clutch.  I put in a large pocket that runs almost the length of the bag and centered a smaller one right on top of it. Then I stitched right up the center to divide them.

Retro Travel Bag

On the back side I added a zip pocket.  This was SO easy!  I thought this was a much more difficult process, but it's not.  I followed this tutorial.  Here are a few photos to show you just how easy it is!

Retro Travel Bag

Retro Travel Bag

Retro Travel Bag

Retro Travel Bag

Retro Travel Bag

Retro Travel Bag

Simple!

Retro Travel Bag

And there you have it!  My new Retro Travel Bag ready for its first trip.  I can't wait to pack this baby full.  I think it will be perfect for my hand stitching projects, MP3 player, snacks and small toys for Riley on the long trip!  Big enough to hold it all yet slim enough to fit in between the seats and not take up much room.  I love making bags and I'm sure this will be one that gets plenty of use!


Christine

Friday, June 29, 2012

Catchin' Up!

Gosh...I don't even know where to start! 
First of all, if you are reading this I just want to say "Thank you!" for not giving up on me.

Things have changed so much since I started this blog a year ago.  I'm not terribly comfortable going into all the details, but I will say we are currently living with my parents due to recent struggles.  My sewing space is a little sewing cabinate tucked in a corner.  I guess I should be happy I have any space at all.  It's just harder when I can't just go sit down and start sewing or just walk over my cutting table to cut something.  I don't know how you kitchen table sewers do it!

But anyway, I have been doing some sewing and quite a bit of handstitching.  I'm taking Handstitching Class and I'm plugging away at my Ruby Bird Baby Quilt.  I really need to get this quilt finished since this little cutie...

My Newest Niece

...was born just a few days ago and we leave for Colorado in less then 3 weeks! 

This quilt is for her, B, and I can't wait to finish it and get to meet my little brother's first baby!  I didn't expect to be so emotional about this, but I have been.  This is the first baby in the family that I haven't been able to meet with in hours of their birth and it has been really hard.  She will be a whole 3 1/2 weeks old be for I get to hold her!  It's killing me!

Ruby Bird Baby Quilt

January

Ruby Bird Baby Quilt

March

Ruby Bird Baby Quilt

April

Ruby Bird Baby Quilt

May

I'm currently working on the July block and should be finished tonight or tomorrow.  When I focus on working on them I can knock them out pretty quick.  Now that B is here I'm really feeling the pressure to get this quilt finished up which equals a lot of hand stitching!

Probably not the best time to take a handstitching class then, right?  Well I did anyway!  I'm gonna have quite a bit of catching up to do and I can't wait to do it!  I'm taking Rachel's Handstitched Class and I can't wait to finish the quilt that goes along with it.  It includes reverse applique, embroidery, english paper piecing, applique and hand quilting.  Now obviously I've done a couple of these, but learning the ones I haven't and having step by step instructions to make the Modern Medalion Quilt are so worth it!

Dogwood Blossom

So far I've done the center medalion which was done with reverse applique.

Medallion Quilt Center

And I have it prepped to start the embroidery.  I'm having a hard time putting this aside.  I wanted to start on it right away and was plannin to, but I really need to get B's quilt done so this will have to wait.  The perk is that I will have plenty to keep me busy on the 17 hour trip out to Colorado and then another 17 hours home!  Just need to make sure I take some Dramamine...

I'm loving my choice to use Aunt Edna by Denyse Schmidt.  I've been picking up fat quarters and yardage evrey chance I get.  I LOVE this line and plan on using it for all of my Handstitched Class projects.

So there ya have it.  That's most of what I have been working on lately.  I have been keeping my Flickr up to date and post quite a bit on Instagram (christink35) so add me to your contacts or follow me if you would like.

Christine

Thursday, May 31, 2012

1st Bloggerversary: A Crayon Roll Tutorial For You!

Its my 1st Bloggerversary! 

I can't believe it's been a year since I decided to dive into the blogging community.  I love being able to share what I have been working on with you and I LOVE the feed back.  I just want to say thank you for reading my ramblings and leaving such wonderful comments, they make my day!

So as a small thank you I am giving you a tutorial.  I love making these little crayon rolls.  They are great for sticking in your purse or the diaper bag and pulling out whenever the kids need a little distraction: in the car, a waiting room, a restaurant, etc.  They also make wonderful gifts or party favors!

Crayon Roll Tutorial

What you will need:
1 outer piece - 12.5 x 5 inches
1 inner piece - 12.5 x 5 inches
1 pocket piece - 12.5 x 5.5 inches
1 piece of batting - 12.5 x 5 inches
1 hair tie
matching thread

Crayon Roll Tutorial

Start by folding the pocket piece (shown in the stripe fabric) long ways like a hot dog bun and press.

Crayon Roll Tutorial

Using a water soluble pencil mark the center of the long edge of the pocket piece on both top (the folded edge) and bottom (where the raw edges meet).  Then place a mark every inch from the center to the edge on each side of the center mark.  Only make five marks on each side for a total of eleven marks.  This will leave you with 1 1/4 inches from the last mark to the edge.  Do this along the top and bottom edge.

Crayon Roll Tutorial

Once you have all marks made you are going to pin the pocket piece to the lining piece.  Line up the raw edges of the pocket piece with the bottom edge of the lining piece and pin well so it doesn't shift.

Crayon Roll Tutorial

Starting along the bottom, sew from the bottom edge mark up to the matching top edge mark back stitching a bit at the top making sure to go to the edge, but not over.  This forms the little pockets for the crayons.  

Crayon Roll Tutorial

Continue until all of the marks have been connected, 11 total.  It should look like this (the above photo).  Now the lining is finished and you can set it aside.


Crayon Roll Tutorial

Take your outer piece and place the batting on the wrong side lining up the edges.  Attach the hair tie to one of the shorter edges (I like to place mine on the right edge when I am looking at it) leaving the majority, about 2/3 to 3/4, of the hair tie on the fabric with the shorter portion hanging off the edge.  Using an 1/8 inch allowance sew the hair tie on back stitching 3 or 4 times making sure it is nice and secure. 

Crayon Roll Tutorial

Now place you inner and outer sections right sides together.

Crayon Roll Tutorial

Pin the layers together making sure nothing will shift.

Crayon Roll Tutorial

Staring along the bottom sew around the edges leaving a small opening for turning.  Be sure to back stitch at the beginning and end.  Clip the corners and turn, making sure to push out the corners.

Crayon Roll Tutorial

Once turned, top stitch about an 1/8 inch from the edge back stitching at the beginning and end.

IMG_8733

Fill with crayons, roll it up and enjoy!

If you have any questions just leave a comment and I will edit the post with the answer and email you.  I would also love to see what you make!  If you make one, or anything inspired by this blog, please post photos in my Flickr group!

Thanks for reading!

Christine


Tuesday, May 8, 2012

Baby Quilts

I managed to get four baby quilts done for my craft show a couple weeks ago and I'm just now getting around to sharing them with you all.  Two boy-ish and two girl-ish.  They were quick and easy, just what I needed to get them done for the show!

Pooches and Pickups Baby Quilt

For this one I used Kona cottons and these cute truck prints form Pooches and Pickups.  I just did some simple straight line quilting and bound it in Kona cotton.

Pooches and Pickups Baby Quilt

Hello Luscious Baby Quilt

This one is made with Kona cotton in white and a Hello Luscious charm pack with Hello Luscious yardage for the back.  This one is also straight line quilted and bound with Kona Cotton.  I made this one from start to finish the day before the show!

Hello Luscious Baby Quilt

Get Together Baby Quilt

This was the first one I pieced.  It's made with more Kona Cotton (pretty much the only solid I work with) and selected prints from Get Together.  I chose to stipple this one and I was pretty happy with how the quilting turned out.

Get Together Baby Quilt

Vintage Modern Baby Quilt

Then there's this little pretty thing!  I love this quilt.  It is probably just the colors, but I want a throw sized one for myself.  I used Kona Cotton in Ash, a Vintage Modern charm pack and Sherbet Dot from Ruby for the back.  For the quilting I gave wavy lines a try and love the look.  I bound it with a dot fabric from my stash.  I just love the whole thing!

Vintage Modern Baby Quilt

Drummer

And then there is this little guy, he was my shadow while I was photographing these quilts.  Isn't he just soooo cute?!  This is Drummer, my little long haired chihuahua weighing in at six whole pounds.  He is my constant shadow.  Whether I'm sitting at my sewing desk or sitting on the couch, cooking dinner or brushing my teeth he is always at my feet.  In fact, in this very picture he is sitting at my feet!  Oh I just love him so much!

Have a wonderful evening!

Christine