
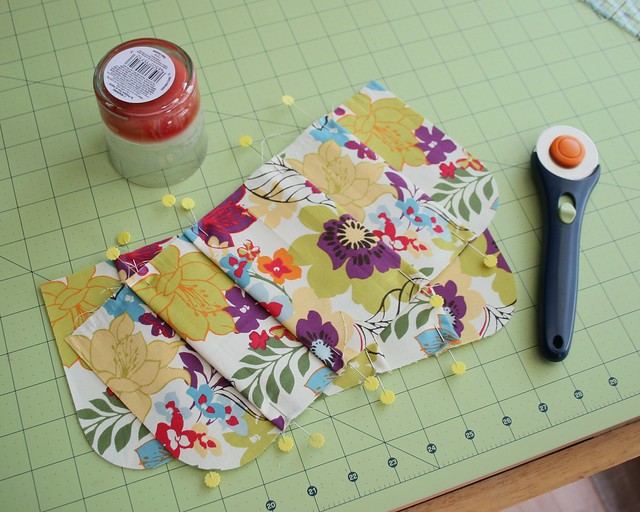
I'm very excited for my first tutorial! I love making zip pouches, they are so fun and come together very quickly. But beware, they are very addicting! It's hard to make just one.
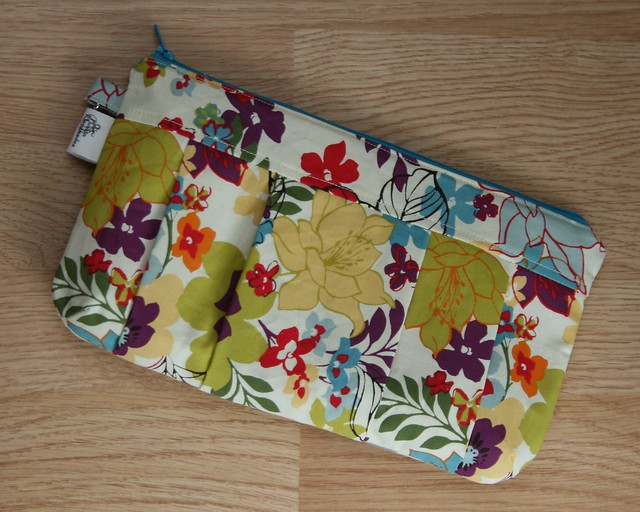
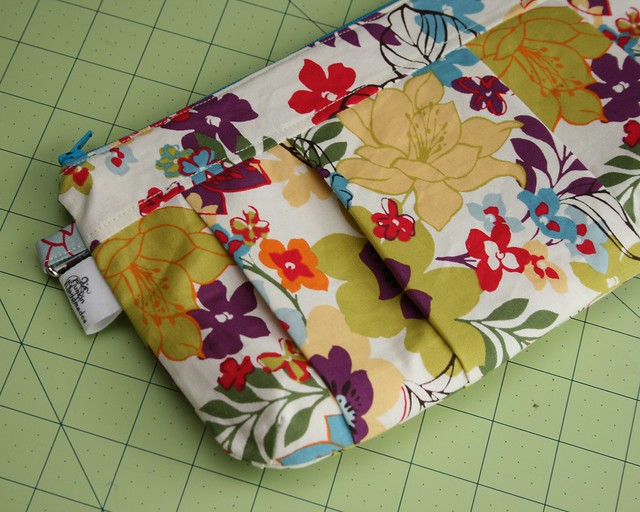 This bag finishes at about 11"x6.25" with a divided pocket on the inside. It's nice and sturdy due to the fusible fleece attached to the lining. I also rounded and darted the corners to give it a nice shape that wouldn't just be flat. I am very happy with the way this bag turned out and hope you are too!
You will need:
For the outer fabric- (2) 5.5"x18" and (2) 2"x11.5"
Lining fabric - (2) 7"x11.5" and (1) 8.5"x8.5"(pocket)
Light weight interfacing - (2) 5"x17.5", (2) 1.5"x11" and (1) 8"x8"
Fusible fleece - (2) 6.5"x11"
Matching Zipper - at least 12" (Mine was 14" because that's what I had on hand.)Optional:
Outer fabric - (1) 2"x2"
A .5" D-ring
Alrighty, lets get started. Attach the matching pieces of interfacing to the 4 outer fabric pieces and to the pocket following the manufactures instructions.
Take the 2 large outer pieces and line them up on your cutting mat or use a ruler to mark it for the pleats. Mark the center of the 18" length, then mark 1" from the center, then 2.5", 4.5" and 6" along the edge. Repeat on the other side of the center line. Do this on both the top and bottom of each piece.
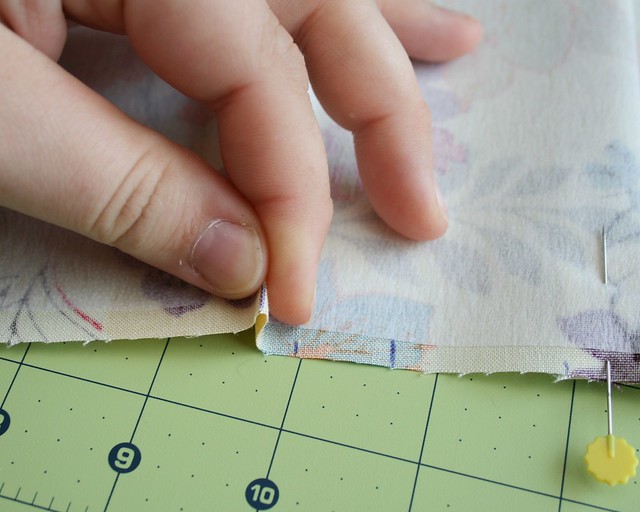
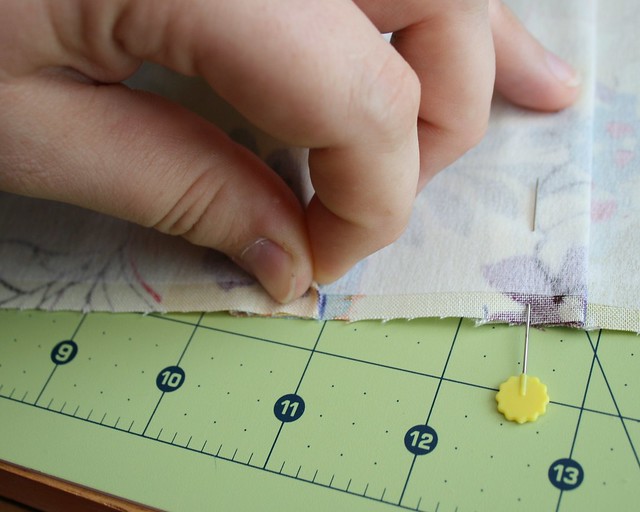
Starting from the outside fold the fabric on the first line and then match it up to the second and pin it. Repeat along the bottom edge. Now fold the fabric at the second line and match up with the fourth line in the same manner as before and pin it. Repeat along the bottom edge as well. Turn the fabric around and repeat the process on the other side. When finished you should have 2 pleats on each side that fold toward the center. Repeat the entire process on the second piece.
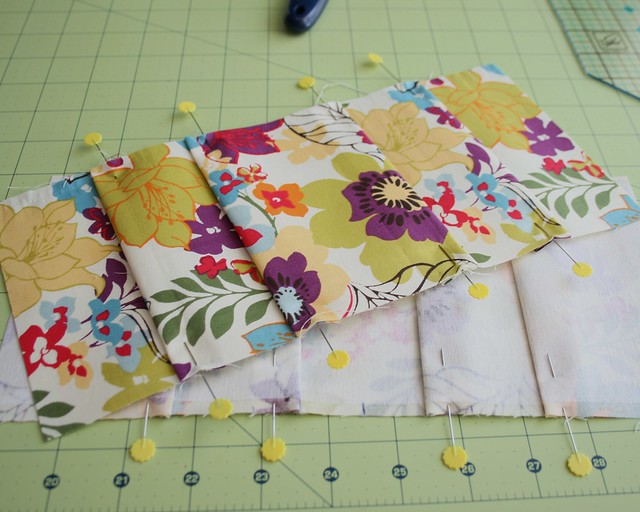
They should look like this.
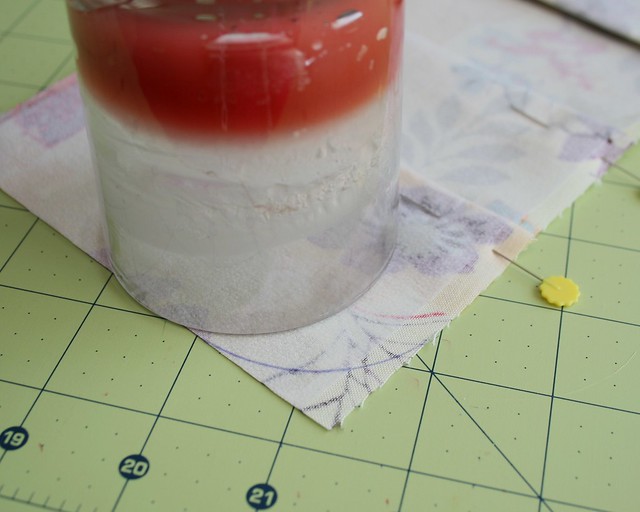
Now you need to round the bottom corners. Just find something small and round, place it on the corner lined up with the sides and trace. I used a small candle, you don't want anything too big. Then cut off the corner on the line you drew.
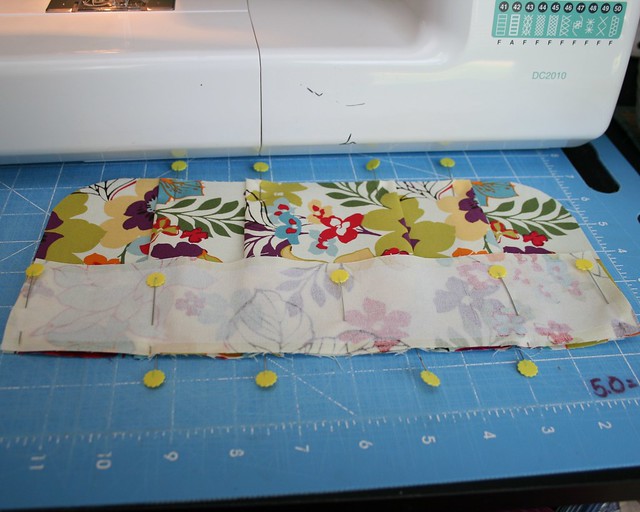

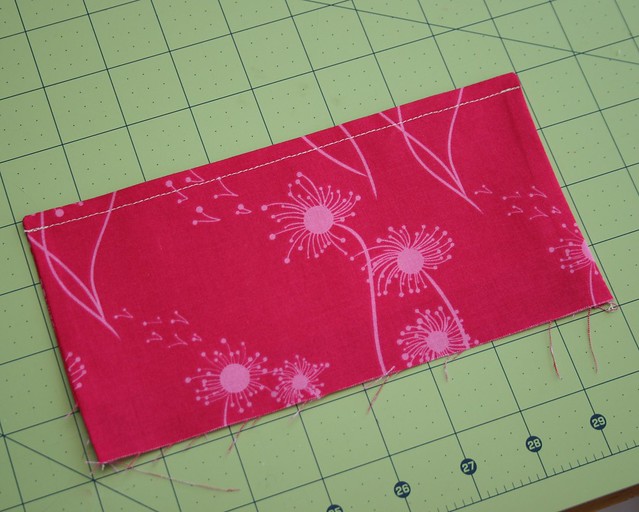
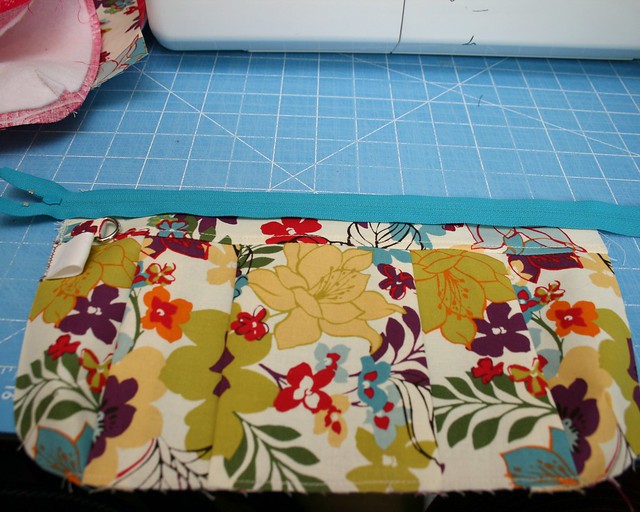
Pin the top bands to the pleated sections. My pleated sections were slightly larger than 11.5" so I lined up the ends and pinned them and then the center and then again between the center and the edges. This way any extra would be eased into the 11.5" band. Sew with a quarter inch seam. Press the seams up toward the bands.
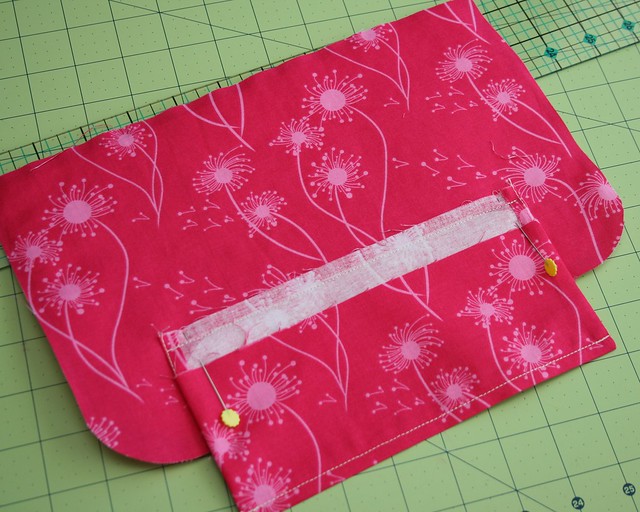
 At this point I also stitched along the bottom just in about an 1/8 of an inch to baste the pleats so I could get rid of all the pins.
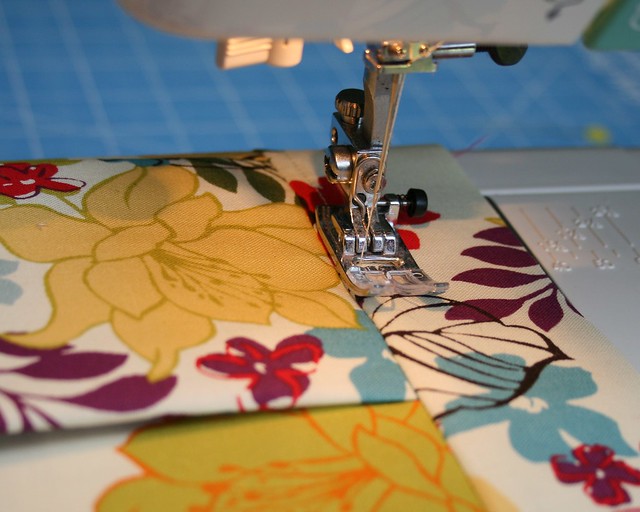 Top stitch a scant quarter inch up from the seam on the top band.
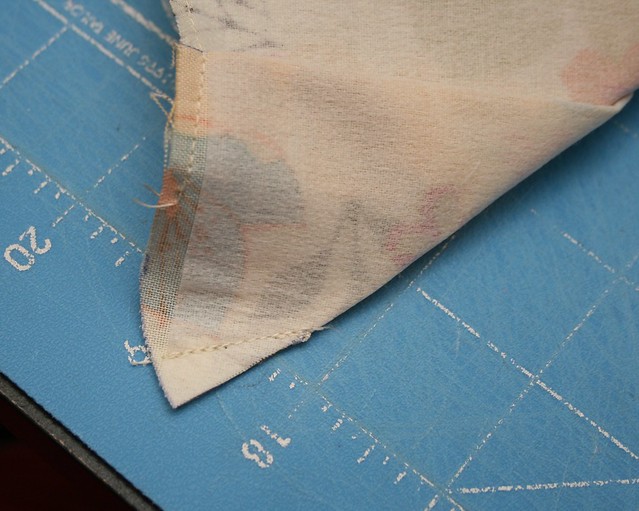

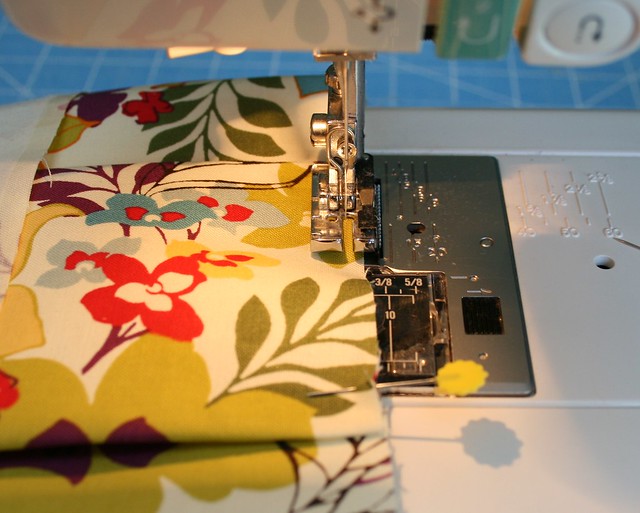
Now you need to dart the corners. I lined up my pieces on my cutting mat and used the 45 degree line to mark an inch in from the edge. Mark all 4 bottom corners in this manner. Then fold on the line, right sides together, and sew a line starting on the inside, an inch in, to the edge a quarter inch from the fold. It might help if you mark the back side of the back side of the fabric.
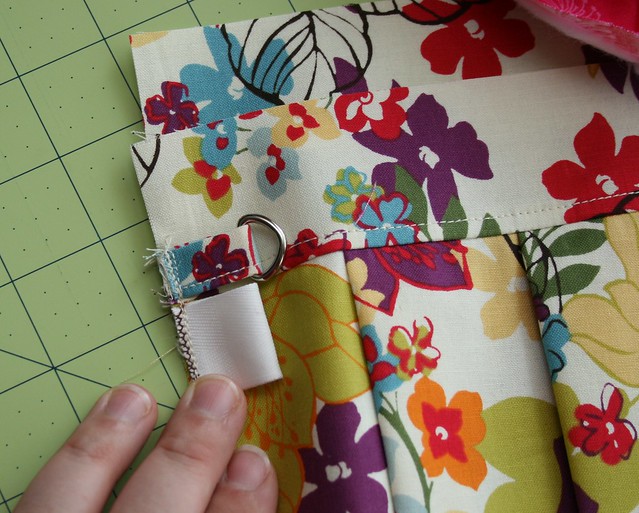
If you are attaching a D-ring or would just like a loop of fabric you need to grab your 2"x2" piece of outer fabric. Fold it in half and press. Unfold and fold the edges into the center fold and press again. Keep the edges folded in and refold along the center line, press again. Stitch about about an 1/8 of and inch along along the unfolded edge. You should now have a piece that measures 2" by about .5". I hope that is clear, I'm sorry I don't have any photos. Slip on the D-ring and fold in half. I usually stitch mine to the left side of the front, but it is up to you, this bag doesn't have a clear front and back so it doesn't really matter. Stitch it on the top band just above the seam (see photo) about an 1/8" from the edge.
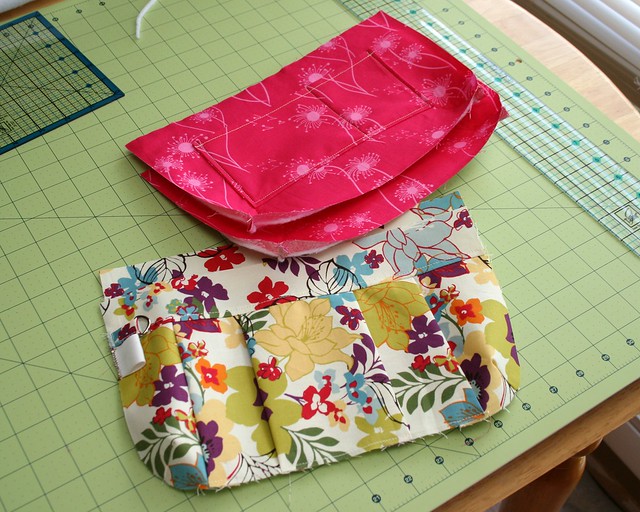
At this point the outer pieces are finished. Time for the lining.
Start by rounding the bottom corners of the lining pieces the same way you did the outer pieces. You also need to round the corners on the two pieces of fusible fleece. Once the corners are rounded you can attach the fusible fleece to the lining pieces, again, follow the manufactures instructions.
 For the pocket grab the 8.5"x8.5" lining piece, fold in half right sides together and stitch down the sides. Turn right side out, press and then top stitch along the folded edge about a quarter inch down.
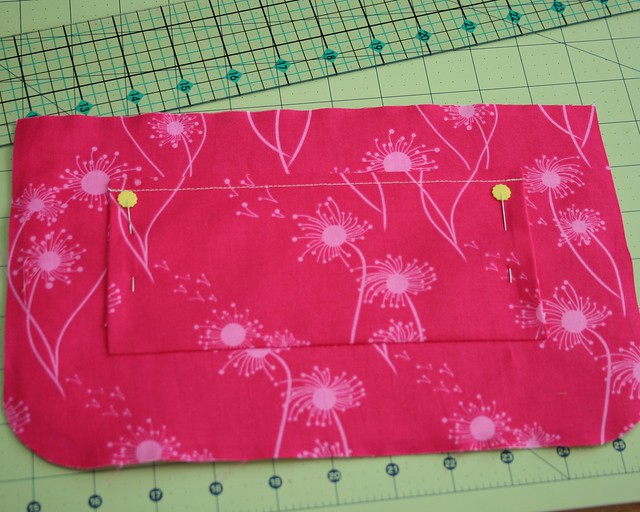
Lay the pocket piece upside down so the raw edge is about 2" from the bottom. Make sure it's centered and sew a quarter inch from the raw edge, press up. Pin in place and then sew a scant quarter inch up both sides back stitching and the beginning and end. Then come in about 2.5"-3" from the right side and stitch up from the bottom back stitching again. (Don't mind my pocket piece, it was a little short, but I made it work.)
 Dart the bottom corners of the lining pieces in the same manner as you did the outer pieces.
Now the outer and lining pieces are finished and ready to become a bag!
Are you still with me? I know this is getting pretty long!
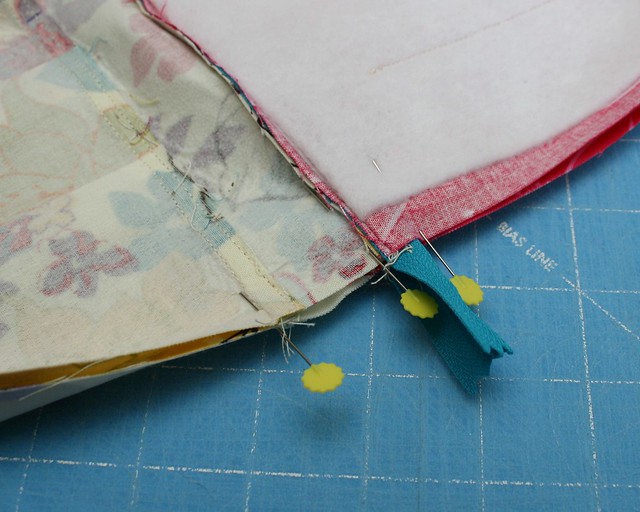
Take an outer piece and lay it right side up, place the zipper top/right side down along the top edge. Then lay the lining piece right side down lining up the top edge with the zipper and top edge of the outer piece. Pin and sew a quarter inch from the edge. You can use your zipper foot, but I didn't.
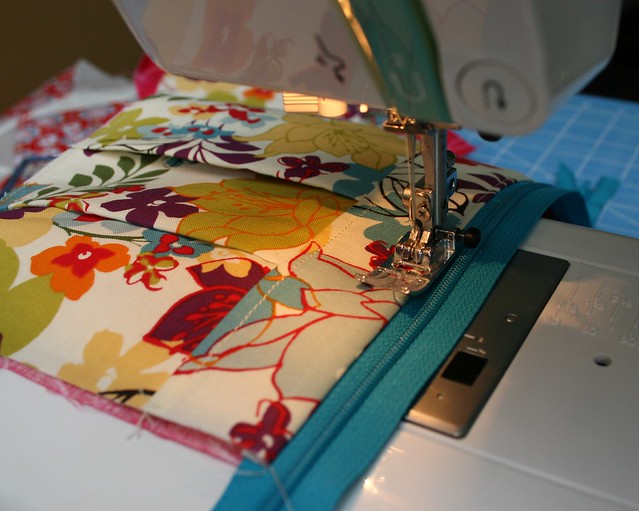

Now flip back the outer and lining piece away from the zipper and top stitch about an eighth of and inch from the edge.
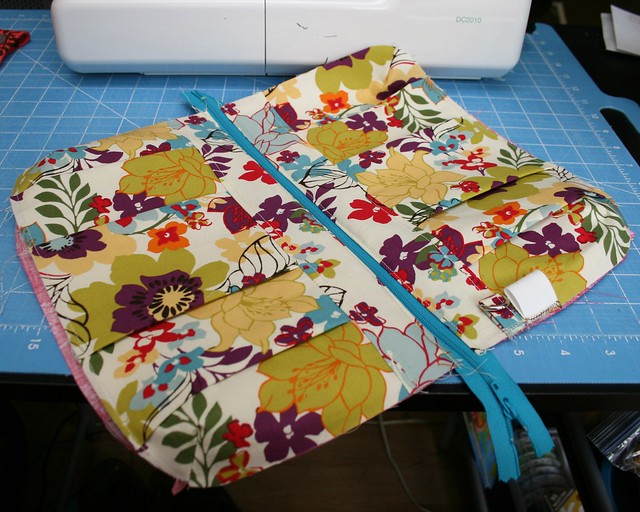
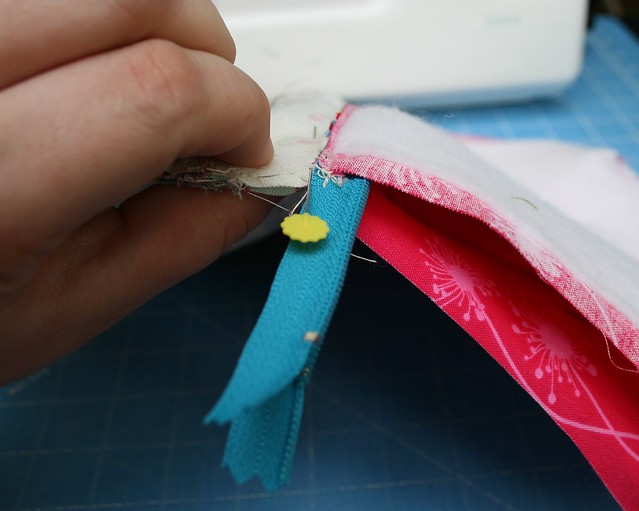
 Repeat with the two remaining pieces making sure the outer pieces are right sides together and the lining pieces are right sides together and top stitch.
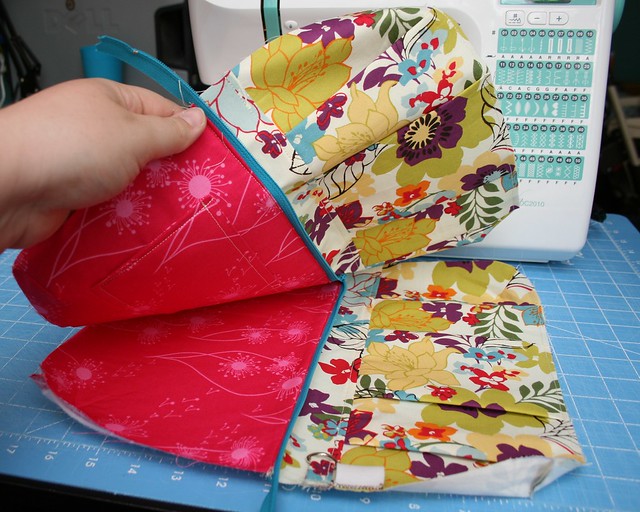

Flip the pieces back right sides together and unzip the zipper 3/4 of the way.
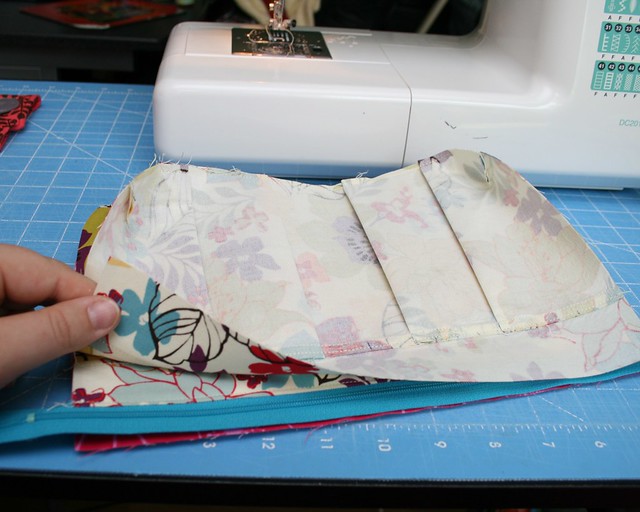
Pin all the way around the edges making sure to pin the zipper coils towards the lining. Make sure to pin it good around the zipper so it doesn't shift while sewing. I made sure to line up the darts and and pleats when pinning.
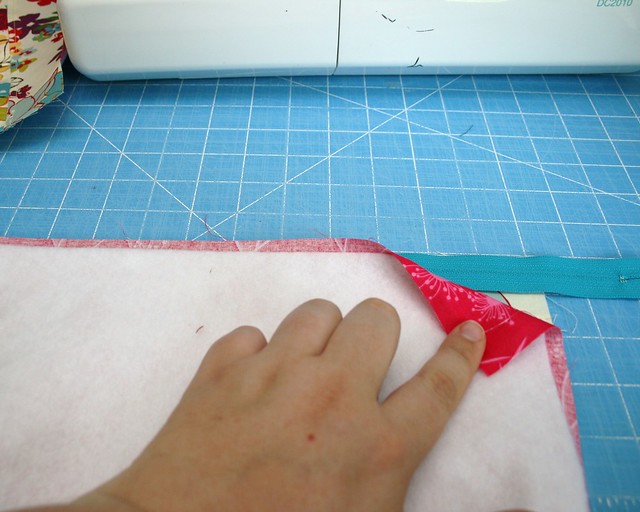
When sewing around the edges I used a 1/4 inch seam around the outside pieces and more like 3/8 to a 1/2 around the lining pieces. This just makes sure the lining fits nicely and doesn't bunch up. Make sure to leave a 3"-4" opening in the bottom of the lining for turning.
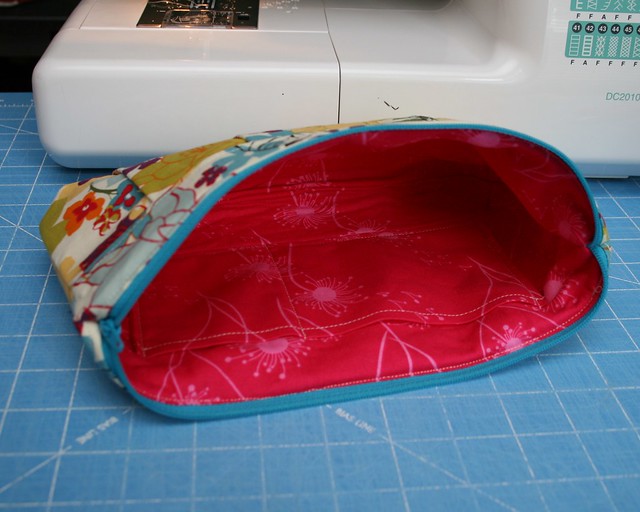
Once you've sewed around the edge, turn the right side out and either machine or hand stitch the opening closed. I always machine stitch it since it's on the inside and no one will really see it. Stuff the lining down into the bag, shape it up a bit and voila!
**Update**
Feel free to post any photos of your bag in my new Flickr group!
11 comments:
Christine this looks fantastic. I can't wait to try one out hopefully this weekend
Very cute! Great tutorial. I keep wanting to make a few zippered pouches, but zippers intimidate me. :)
Great tutorial - thank you.
Can't wait to try it. Love the new look of your blog!
I love this! I'm pinning it! Thanks for sharing!
Thank you so much for the tutorial! I love it!
I made this adorable pouch for my mom. I reduced the size a bit. I only did the pleats on the front. I added wide belt loops on the back to make it the prettiest fanny pack I have ever seen. :) I added a zipper inside and pockets for credit cards inside too. My mom uses it for gambling purse. http://www.flickr.com/photos/organize/?start_tab=one_set72157627750116767
This is a really cute take on a normal zip pouch. Love the fabric. Well done on your first tutorial the pictures are really really clear and easy to understand.
Mel@allwrappedup
Thank you for such a great tutorial! I loved how you inserted the zipper. I used your tutorial (and linked back to it) to make my bridesmaid clutches... if you want to check it out, you can find it here:
http://handmadeisbetterblog.com/2013/05/19/handmade-bridesmaids-clutches/
Thanks a lot for your great tutorial. It was helpful for me.
This is EXACTLY what I was looking for. I have a ton of fabric and I think this is how I'm going to use it up. Thank you!
Post a Comment